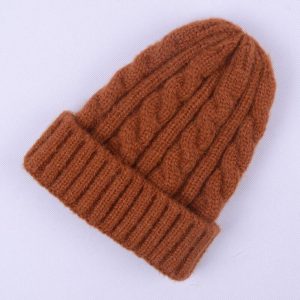
In the captivating world of crochet, the ability to craft your own stylish and cozy hats is a skill that adds an extra layer of warmth and personalization to your wardrobe. Whether you’re a seasoned crocheter or a beginner eager to dive into this rewarding craft, learning how to make crochet hats can be an incredibly fulfilling and empowering experience.
In this comprehensive guide, we’ll take you through the step-by-step process of creating your own crochet hats, from selecting the right materials to mastering the essential techniques. With detailed instructions, helpful tips, and a wealth of creative inspiration, you’ll have the knowledge and confidence to transform a simple ball of yarn into a beautiful, custom-made headpiece that reflects your unique style.
Prepare to unlock your crochet superpowers and create the perfect crochet hat that will keep you cozy and fashionable.
Gathering the Essential Crochet Hat Supplies
Before you can begin your crochet hat-making journey, it’s important to gather the necessary supplies and equip yourself with the right tools for the job.
Choosing the Appropriate Yarn
The type of yarn you select can greatly impact the final outcome of your crochet hat, so it’s crucial to choose wisely.
Considering Yarn Weight and Fiber Content
Opt for a medium-weight yarn, such as worsted or DK, as they are generally well-suited for crochet hat projects. Additionally, consider the fiber content, as natural fibers like wool or cotton can provide different qualities.
Selecting Complementary Colors
Experiment with a variety of colors and color combinations to find the perfect palette that reflects your personal style or the intended recipient’s preferences.
Selecting the Correct Crochet Hook
The crochet hook you use will determine the size and tension of your stitches, so choosing the right one is essential.
Matching the Hook Size to the Yarn
Refer to the yarn’s label or a crochet hook size guide to select a hook that corresponds with the weight of the yarn you’ve chosen.
Considering Ergonomic and Comfort Factors
Opt for a crochet hook that feels comfortable in your hand, as you’ll be using it extensively throughout the project.
Gathering Additional Accessories
While yarn and a crochet hook are the primary essentials, there are a few additional accessories that can make your crochet hat-making experience more seamless.
Incorporating a Tapestry Needle
A tapestry needle with a large eye can be incredibly helpful for weaving in ends and finishing touches.
Utilizing Stitch Markers
Placing stitch markers at key points in your work can help you keep track of your progress and maintain the correct stitch count.
Mastering the Crochet Techniques for Hats
With your supplies in hand, it’s time to dive into the fundamental crochet techniques that will serve as the building blocks for creating your custom-made hats.
Understanding the Basic Crochet Stitches
Familiarizing yourself with the basic crochet stitches, such as the chain stitch, single crochet, and double crochet, is essential for constructing a sturdy and well-structured hat.
Practicing the Chain Stitch
The chain stitch forms the foundation for most crochet projects, including hats, so mastering this technique is a crucial first step.
Exploring the Single and Double Crochet
These two stitches are the workhorses of crochet hat-making, allowing you to build up the body of the hat with consistent, even rows.
Shaping the Hat with Increase and Decrease Stitches
Mastering the techniques of increasing and decreasing stitches is crucial for creating the curved, tapered shape of a classic crochet hat.
Increasing Stitches for Hat Shaping
Strategically increasing stitches at specific points in your work will help you achieve the desired hat silhouette.
Decreasing Stitches for a Snug Fit
Decreasing stitches, particularly towards the top of the hat, ensures a comfortable and secure fit on the wearer’s head.
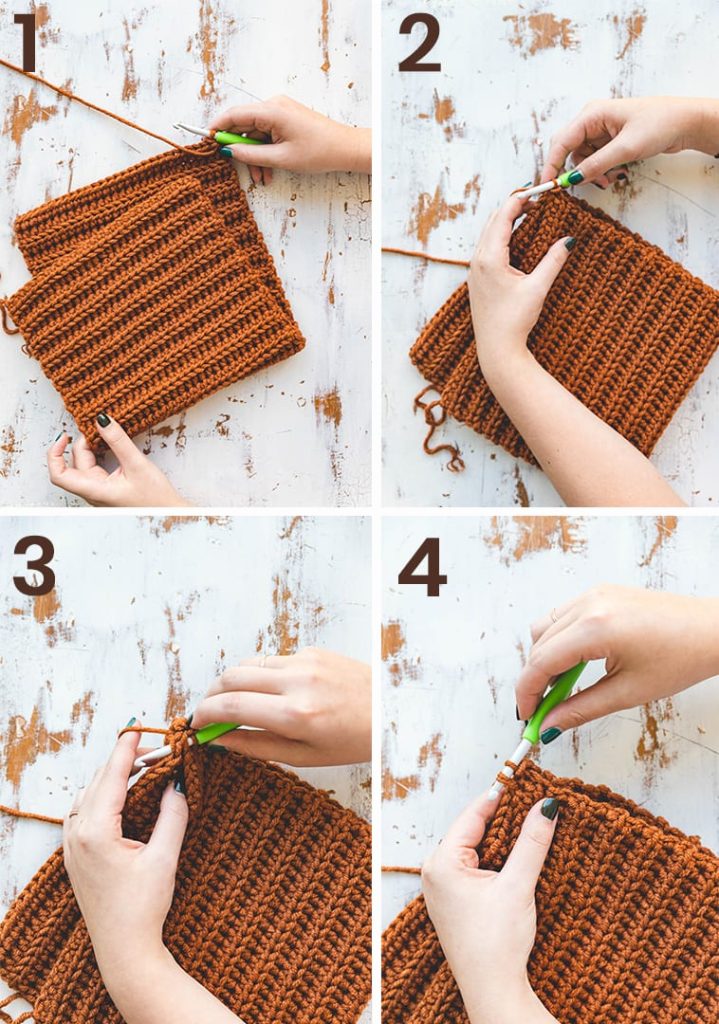
Perfecting the Crown Finishing Technique
The final step in creating a crochet hat is the crown finishing, which can vary depending on the specific pattern or style you’re aiming for.
Closing the Crown with a Slip Stitch
One common method is to use a slip stitch to neatly close the top of the hat, creating a smooth, seamless finish.
Experimenting with Alternative Crown Finishes
Depending on the design, you may also explore other crown finishing techniques, such as a pom-pom or a tassel, to add a unique touch to your crochet hat.
Step-by-Step Guide to Crocheting a Basic Hat
Now that you’ve mastered the essential crochet techniques, let’s dive into the step-by-step process of creating a classic crochet hat.
Measuring and Calculating the Gauge
Before you begin crocheting, it’s important to measure your gauge, which will help you determine the appropriate number of stitches and rows to achieve the desired hat size.
Measuring the Gauge Swatch
Create a small swatch of crochet stitches, measure its dimensions, and calculate the number of stitches and rows per inch.
Adjusting the Gauge as Needed
If your gauge doesn’t match the pattern’s specifications, you may need to adjust your hook size or tension to ensure a proper fit.
Crocheting the Hat’s Brim or Ribbing
Many crochet hat patterns start with the brim or ribbing, which provides a sturdy, stretchy foundation for the rest of the hat.
Working in Rounds or Rows
Depending on the pattern, you may crochet the brim in continuous rounds or in rows, shaping the hat as you go.
Incorporating Increase and Decrease Stitches
Strategically placing increase and decrease stitches will help you achieve the desired brim or ribbing shape.
Continuing the Hat’s Body
Once the brim or ribbing is complete, you’ll transition into crocheting the main body of the hat, gradually building up the height and shaping the crown.
Maintaining Consistent Stitch Counts
Carefully tracking your stitch counts and following the pattern instructions will ensure the hat retains its proper shape and size.
Incorporating Increase and Decrease Stitches
As you continue crocheting, remember to incorporate increase and decrease stitches at the appropriate intervals to shape the hat.
Finishing the Crown
The final step in creating your crochet hat is the crown finishing, which can be achieved through various techniques depending on the pattern.
Closing the Crown with a Slip Stitch
One common method is to use a slip stitch to neatly close the top of the hat, creating a smooth, seamless finish.
Exploring Alternative Crown Finishes
Depending on the design, you may also experiment with other crown finishing techniques, such as a pom-pom or a tassel, to add a unique touch to your crochet hat.
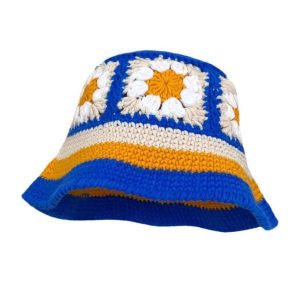
Customizing and Embellishing Crochet Hats
Once you’ve mastered the basic crochet hat-making process, the possibilities for customization and embellishment are endless, allowing you to truly make each hat your own.
Incorporating Stitch Patterns and Textures
Experiment with different stitch patterns and textural elements to add visual interest and personal flair to your crochet hats.
Exploring Cables and Lace Stitches
Incorporating intricate cable or lace stitches can elevate the design of your crochet hats.
Creating Textured Surfaces
Techniques like the bobble stitch or the V-stitch can introduce unique and eye-catching textures to your headwear.
Adding Decorative Accents and Embellishments
Take your crochet hats to the next level by incorporating various decorative elements and embellishments.
Crocheting Brim Embellishments
Attach crocheted flowers, appliqués, or other decorative elements to the brim of the hat for a touch of whimsy.
Incorporating Tassels or Pompoms
Adding a playful tassel or a fluffy pompom to the crown of the hat can elevate the overall design.
Personalizing with Initials or Monograms
For a truly one-of-a-kind touch, consider incorporating personalized initials or monograms into your crochet hat design.
Crocheting Letters or Motifs
Carefully plan and execute the placement of letters or personalized motifs within the hat’s structure.
Embroidering Names or Initials
Alternatively, you can embroider names, initials, or other personal details directly onto the finished crochet hat.
Conclusion: Embrace the Joy of Crochet Hat-Making
Mastering the art of crochet hat-making is a rewarding journey that allows you to create personalized, cozy, and stylish headwear that reflects your unique style and creativity. Through this comprehensive guide, you have gained the essential knowledge, techniques, and confidence to transform a simple ball of yarn into a beautiful crochet hat that you can wear with pride.
Whether you’re crocheting a classic beanie, a slouchy beret, or an intricate textured masterpiece, the process of crafting your own crochet hats is an incredibly fulfilling experience. Embrace the meditative rhythm of the stitches, the satisfaction of watching your creation take shape, and the joy of wearing a one-of-a-kind accessory that you’ve made with your own hands.
As you continue to explore the world of crochet hat-making, remember to experiment, embrace your creativity, and find joy in the process. With each new hat you create, your skills will continue to grow, and you’ll unlock a deeper connection to the craft, allowing you to express your personal style and create truly unique and cherished pieces.
Unlock the art of crochet hat-making and embrace the warmth, creativity, and personal expression that comes with crafting your own custom-made headwear.