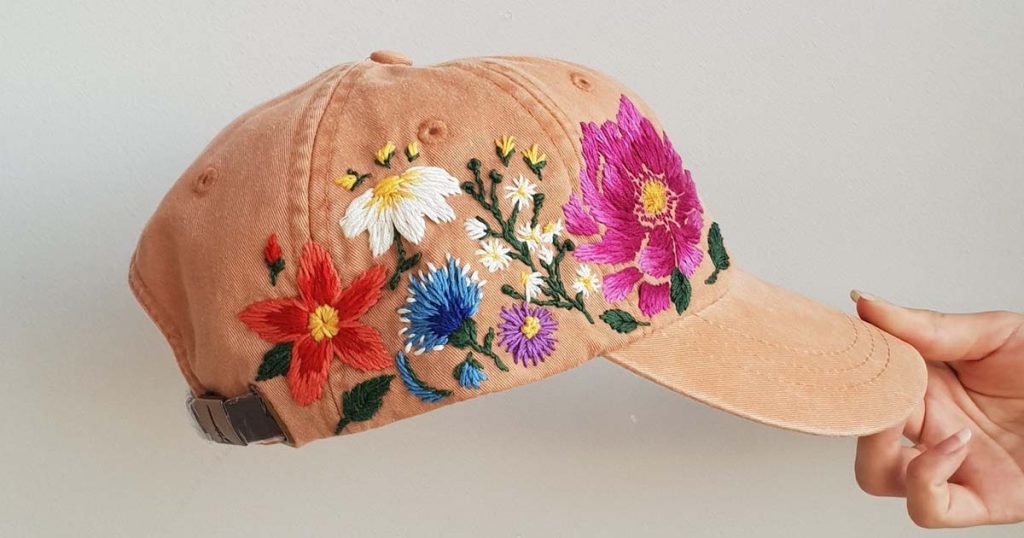
In the world of fashion and personal expression, customizing everyday accessories can be a genuinely fulfilling and creative endeavor. One of the most captivating ways to transform a simple hat into a unique and personalized statement piece is through the art of embroidery. Whether you’re looking to add a touch of whimsy to a baseball cap, elevate a classic beanie, or create a one-of-a-kind gift, embroidering a hat can be a rewarding and satisfying experience.
In this comprehensive guide, we’ll delve into the step-by-step process of embroidering a hat, covering the essential tools, techniques, and design considerations to help you unlock your artistic potential. Regardless of your skill level, this article will equip you with the knowledge and confidence to transform ordinary headwear into extraordinary, custom-embroidered masterpieces.
Prepare to unleash your creativity and embroider the perfect hat that reflects your unique style and personality.
Understanding the Basics of Embroidering Hats
Before you begin your hat embroidery journey, it’s essential to grasp the fundamental concepts and considerations that will ensure your success.
Selecting the Appropriate Fabrics and Threads
The first step in embroidering a hat is choosing the right materials to work with, as they can greatly impact the final result.
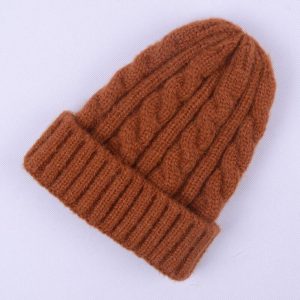
Identifying Suitable Hat Fabrics
Look for hats made from natural fibers, such as cotton or linen, as they are typically more receptive to embroidery techniques.
Choosing High-Quality Embroidery Threads
Opt for threads specifically designed for embroidery, as they are more durable and vibrant compared to regular sewing threads.
Preparing the Hat for Embroidery
Proper preparation of the hat is crucial to ensure a smooth and successful embroidery process.
Stabilizing the Fabric
Applying a stabilizer or interfacing to the hat’s fabric can provide a sturdy foundation for your embroidery stitches.
Marking the Design
Use a washable or disappearing fabric marker to sketch out your desired embroidery design on the hat, guiding your stitching process.
Selecting the Appropriate Embroidery Techniques
Depending on the complexity of your design and the desired aesthetic, different embroidery techniques may be more suitable for hats.
Exploring Hand Embroidery
Hand embroidery techniques, such as the backstitch, satin stitch, or French knot, can add a charming, handcrafted touch to your hat.
Considering Machine Embroidery
For more intricate or repetitive designs, utilizing a sewing machine or a dedicated embroidery machine can streamline the process.
Step-by-Step Guide to Embroidering a Hat
Now that you’ve gained a solid understanding of the fundamentals, let’s dive into the step-by-step process of embroidering a hat, whether you choose to work by hand or with a machine.
Preparing the Hat for Embroidery
Begin by thoroughly preparing the hat to ensure a smooth and successful embroidery experience.
Stabilizing the Hat’s Fabric
Attach a suitable stabilizer or interfacing to the hat’s fabric, following the manufacturer’s instructions.
Marking the Embroidery Design
Using a fabric marker, carefully transfer your desired embroidery design onto the hat, ensuring accurate placement.
Hand Embroidering the Hat
For those who prefer the traditional, hands-on approach, the art of hand embroidery can transform a simple hat into a unique and personalized accessory.
Selecting the Appropriate Stitches
Choose from a variety of hand embroidery stitches, such as the backstitch, satin stitch, or French knot, to bring your design to life.
Executing the Embroidery
Carefully work your way through the design, maintaining consistent tension and neat, uniform stitches.
Machine Embroidering the Hat
If you have access to a sewing machine or a dedicated embroidery machine, you can leverage the speed and precision of machine embroidery to create intricate, professional-looking designs.
Preparing the Machine and Hoop
Secure the hat firmly in the embroidery hoop, ensuring a tight and wrinkle-free fabric surface.
Stitching the Embroidery Design
Follow the instructions for your specific machine to stitch out the embroidery design, allowing the machine to do the intricate work.
Finishing Touches and Final Detailing
Once the embroidery is complete, take the time to add any final touches or details to elevate your hat to the next level.
Trimming Excess Threads
Carefully trim any loose or excess threads, ensuring a clean and tidy finish.
Steaming or Pressing the Hat
Lightly steam or press the hat to set the embroidery and smooth out any wrinkles or puckering.
Mastering the Art of Hat Embroidery Design
Embroidering hats is not just about the technical execution; it’s also about unleashing your creative potential and designing captivating embroidery patterns that truly reflect your unique style.
Exploring Inspirational Design Sources
Seeking inspiration from a variety of sources can help you cultivate innovative and visually striking embroidery designs for your hats.
Drawing Inspiration from Nature
Organic forms, intricate patterns, and vibrant colors found in nature can serve as a rich source of inspiration for your embroidery designs.
Incorporating Personal Symbolism
Incorporating personal symbols, monograms, or meaningful motifs can add a deeply personalized touch to your embroidered hats.
Considering Placement and Layout
The placement and layout of your embroidery design can significantly impact the overall aesthetic and visual balance of the hat.
Strategizing Focal Points
Identify the key focal points on the hat’s surface and design your embroidery accordingly, drawing the eye to the most impactful areas.
Experimenting with Asymmetry
Embracing asymmetrical or off-center embroidery placements can create a dynamic and visually captivating effect.
Selecting Complementary Color Palettes
The choice of color in your embroidery design can make a substantial difference in the overall harmony and visual appeal of the hat.
Coordinating with the Hat’s Base Color
Choose embroidery thread colors that complement or contrast with the base color of the hat for a cohesive and intentional look.
Incorporating Vibrant or Muted Hues
Experiment with bold, vibrant thread colors or opt for more muted, earthy tones, depending on the desired aesthetic.
Caring for and Maintaining Embroidered Hats
To ensure the longevity and continued enjoyment of your custom-embroidered hats, it’s essential to establish a proper care and maintenance routine.
Proper Washing and Cleaning Techniques
Handling embroidered hats with care during the cleaning process is crucial to preserve the integrity of the stitching.
Gentle Hand Washing or Spot Cleaning
Avoid machine washing embroidered hats; instead, opt for gentle hand washing or spot cleaning to prevent damage to the stitches.
Air Drying and Avoiding Heat
Always air dry your embroidered hats, as exposure to heat from machine drying or ironing can compromise the threads and fabric.
Storing Embroidered Hats Safely
Proper storage is essential to maintain the shape, condition, and longevity of your custom-embroidered headwear.
Utilizing Hat Boxes or Display Stands
Store your embroidered hats in hat boxes or on display stands to prevent creasing, fading, or distortion of the design.
Protecting from Sunlight and Humidity
Keep your embroidered hats away from direct sunlight and high-humidity environments, as these can cause fading and fiber damage over time.
Addressing Wear and Tear
Even with the best care, embroidered hats may occasionally require minor repairs or touch-ups to keep them looking their best.
Repairing Loose or Damaged Stitches
Carefully re-stitching any loose or damaged areas can help restore the integrity of the embroidery.
Consulting Professional Restoration Services
For more complex issues or significant damage, consider seeking the expertise of a professional embroidery restoration service.
Conclusion: Unleash Your Creativity and Embroider the Perfect Hat
Embroidering a hat is a captivating journey that allows you to transform a simple accessory into a unique, personalized expression of your style and creativity. Through this comprehensive guide, you have gained the essential knowledge, techniques, and design principles to embroider the perfect hat that reflects your individual flair.
Whether you choose to hand-stitch your design or leverage the precision of machine embroidery, the process of customizing a hat with your own embroidered artwork is a truly rewarding experience. Embrace the opportunity to experiment with diverse stitches, color palettes, and layout designs, and let your imagination soar as you create one-of-a-kind headwear that you’ll be proud to wear.
Remember, the true joy of embroidering hats lies not only in the final product but also in the act of self-expression and the fulfillment of bringing your artistic vision to life. As you continue to hone your embroidery skills and explore new design possibilities, relish in the satisfaction of wearing a hat that is a true reflection of your unique personality and style.
Unleash your creativity and embroider the perfect hat that will captivate and delight.