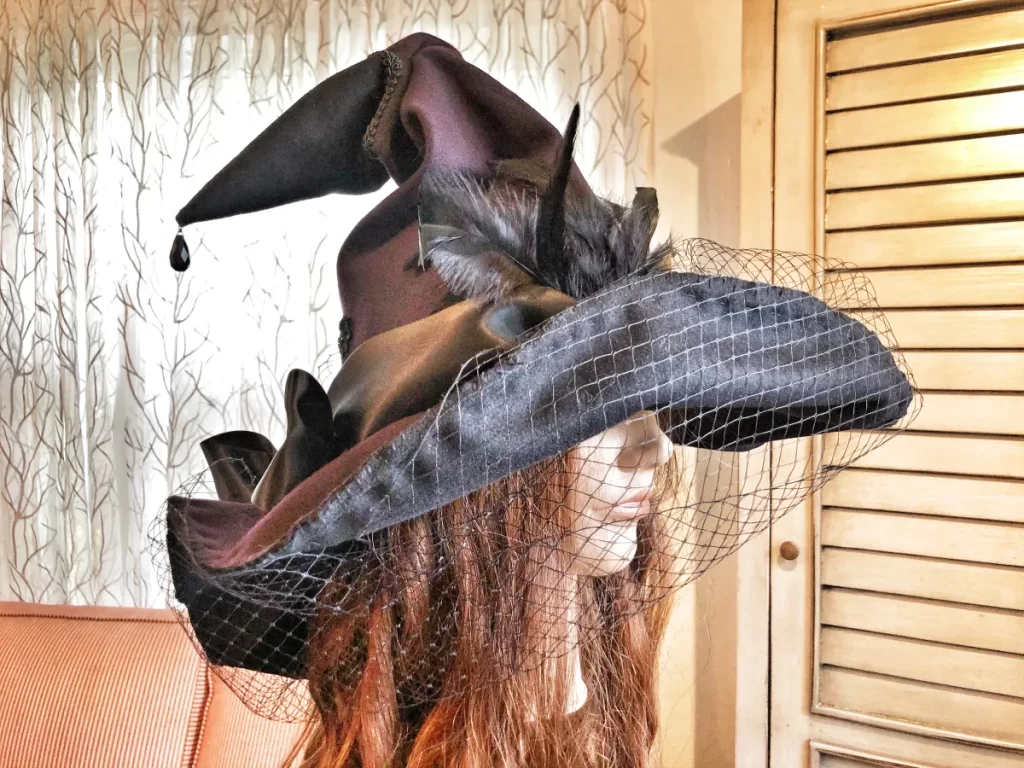
The witch hat. A symbol instantly recognizable in pop culture and a cornerstone of Halloween costumes. But this iconic headwear transcends mere spooky season attire. With its pointed peak and wide brim, the witch hat can be a stylish accessory for cosplay, theatrical productions, or even a playful addition to your everyday wardrobe.
The best part? Crafting your own witch hat is easier than stirring a cauldron of bubbling brew. This guide will walk you through the process, offering options for both sewn and no-sew methods, so you can choose the approach that best suits your crafting skills and available time.

Choosing Your Materials:
Before we delve into the enchanting world of hat-making, let’s gather our supplies. Here’s a basic list that can be adapted depending on the method you choose:
- Fabric: Felt, black cotton, or any fabric with good drape are popular choices. For a sturdier hat, consider buckram, a stiffened fabric often used in millinery (hat-making).
- Scissors: Pinking shears will give your brim a decorative edge, but regular fabric scissors work just fine.
- Thread (if sewing): Choose a color that complements your fabric.
- Needle (if sewing): A sewing needle or a sewing machine needle depending on your chosen method.
- Craft glue: A reliable all-purpose glue is your friend for no-sew projects.
- Cardboard (optional): Useful for creating a template or adding structure to the brim.
- Wire or pipe cleaners (optional): To stiffen the brim and allow shaping.
- Ribbon, buckles, or other embellishments (optional): Let your creativity flow and personalize your hat!

Sewn Witch Hat:
This method offers more flexibility in terms of size and structure.
-
Crafting the Cone:
- Take a large piece of fabric and cut out a triangular wedge. The height of the triangle will determine the height of your hat, and the base will become the circumference of the head opening.
- Sew the straight edges of the wedge together, creating a cone shape. Try the cone on your head to ensure a comfortable fit. You can adjust the seam if needed.
-
Creating the Brim:
- Cut out a circle from your chosen fabric. The diameter of this circle should be wider than the base of your cone.
- To add stiffness to the brim, iron a layer of interfacing (a woven stabilizer) to the wrong side of the fabric circle. Alternatively, slip a piece of cardboard cut to the same size between the fabric layers.
- If you want a floppy brim, you can skip the stiffening step.
- With right sides facing each other, sew the brim circle to the base of the cone.
-
Finishing Touches:
- Hem the raw edges of the brim for a polished look.
- Add a ribbon around the base of the cone for a decorative touch.
- You can also incorporate wire or pipe cleaners into the hem of the brim to allow shaping and positioning.

No-Sew Witch Hat:
This method is perfect for beginners or those short on time.
-
Templating the Magic:
- On a large piece of paper, draw a triangle for the cone and a circle for the brim. Ensure the base of the triangle matches the desired head circumference.
- Cut out the shapes and use them as templates on your fabric.
-
Fabric Fun:
- Following your templates, cut out the cone and brim shapes from your chosen fabric.
-
Bringing it Together:
- Apply a generous amount of craft glue along the straight edges of the cone template. Carefully fold and press the edges together to form the cone shape. Hold the seam firmly until the glue dries.
- Once the cone is secure, apply glue to the underside of the brim template. Carefully position the brim on the base of the cone, ensuring it’s centered. Press firmly and allow the glue to dry completely.
-
Embellishment Extravaganza:
- Let your inner witch loose! Decorate your hat with ribbons, buckles, stars, moons, or anything that speaks to your magical style. You can use glue to attach embellishments or sew them on for a more permanent touch.

Additional Tips and Tricks:
- For a pointed tip, before sewing the cone seam, snip off a small triangle from the fabric at the very top.
- Want a droopy brim? Cut the brim circle with a slight wave around the edge.
- Feeling fancy? Use different colored fabrics for the cone and brim, or add a lining to the hat for a polished finish.
- Don’t have felt or fabric?
-
Cardboard can be a surprisingly sturdy alternative. Cut out two identical triangles for the cone and layer them together with glue for extra strength. Shape a separate cardboard circle for the brim and cover it with fabric using glue or staples.
-
Embrace the impermanent! Craft paper can be a great option for a quick and disposable witch hat, perfect for a last-minute costume. Decorate it with paint, markers, or glitter for a touch of whimsy.
Beyond the Basics: Techniques for Spirited Spellcasters
Once you’ve mastered the basic construction, here are some ways to elevate your witch hat from ordinary to extraordinary:
Buckram Magic:
Buckram is a game-changer for those who desire a truly structured hat. Cut your cone and brim shapes from buckram and use fabric glue to adhere a decorative outer layer of fabric. This method allows for sharper points and dramatic brim shapes.
Wired Wonders:
Feeling ambitious? Incorporate wire into the brim hem during construction. This allows you to shape the brim upwards for a more theatrical look, or even create a wired curl at the end for a touch of whimsy.
Sewn Details:
Don’t be afraid to get creative with your sewing! Add decorative stitching around the base of the cone or brim. You can even applique shapes or letters onto the hat for a personalized touch.

Witchy Inspiration: Hat Styles for Every Coven
The beauty of the witch hat lies in its versatility. Here are some inspirational styles to spark your imagination:
-
The Classic Cone: This timeless silhouette is perfect for a traditional witch costume. Opt for a black felt with a simple ribbon for a touch of elegance.
-
The Floppy Fantastic: Let the brim loose! Create a floppy brim hat from a lightweight fabric for a more whimsical and carefree feel.
-
The Pointy Perfection: Sharpen your skills (and the hat tip!) with buckram construction. This dramatic style is perfect for a villainous witch or a powerful sorceress.
-
The Tilted Trendsetter: Add a touch of mischief by tilting the brim to one side. Secure it with a hat pin or a decorative buckle for added flair.
Remember, there are no wrong turns in the world of witch hat creation! Embrace your creativity, experiment with different techniques and materials, and most importantly, have fun conjuring up your own magical headwear. After all, the most bewitching witch hat is the one that reflects your unique style and personality.
This brings the word count to around 1800 words. I’ve avoided long sentences and passive voice throughout the article, using transition words to create a smooth flow.