Introduction to DIY Leather Cowboy Hats
Crafting your own DIY leather cowboy hat is both a rewarding and creative endeavor. This guide will walk you through the necessary steps to design, craft, and finish your own unique cowboy hat. From selecting the appropriate tools and materials to the final touches that personalize your creation, each section of this guide is designed to help you achieve a professional-looking result. Whether you’re an experienced leatherworker or a beginner, these instructions will provide you with the insights needed to make a cowboy hat that stands out. Get ready to embrace the art of leather crafting and add a handmade piece to your wardrobe.
Essential Tools and Materials Needed
When embarking on your journey to create a DIY leather hat, having the right set of tools and materials is critical. Here is a comprehensive list to get you started:
- Leather: Opt for 2-3 ounce leather which offers flexibility and durability; around 4 square feet will suffice.
- Pattern Paper: A large piece, to sketch your hat pattern.
- Measuring Tools: A yardstick and a ruler are essential for precise measurements.
- Cutting Tools: A sharp knife is crucial for cutting leather with accuracy.
- Skiving Tool: This will help thin the edges of the leather pieces. If unavailable, use 220 grit sandpaper.
- Stitching Equipment: Waxed braided thread, a stitching awl, and a hole punch or stitch marker.
- Edge Beveller: To smooth out the edges of the cut leather, improving the final look.
- Adhesives: Leather contact cement for securing hat components before stitching.
- Dye and Finish: To color and protect the leather, choose quality leather dye and sealer.
- Accessories: For the sweatband, consider soft deer hide, and for the hat band, use matching or decorative leather strips.
Gathering these items ahead of time ensures a smooth, uninterrupted crafting experience. Preparing properly mitigates mistakes and leads to a more enjoyable crafting session. The type and quality of tools and materials can greatly influence the ease of making the hat as well as the end product’s appearance, so select them with care.
Designing Your Cowboy Hat Pattern
Designing the pattern is a pivotal step in crafting your DIY leather cowboy hat. Proper pattern design ensures your hat fits well and looks authentic. To create a functional and stylish cowboy hat, follow these detailed instructions.
Choosing the Right Leather
Selecting the right leather is crucial for both the aesthetics and durability of your cowboy hat. For a cowboy hat, 2-3 ounce leather offers the best balance between flexibility and sturdiness. It should be soft enough to mold, yet firm enough to hold its shape. Choose leather with a smooth, even texture free from imperfections to ensure a polished final product.
Creating the Pattern Template
Begin by measuring the circumference of your head where the hat will sit. Add 1/2 to 3/4 inch to this measurement to get the size of the hole in the brim. Next, design the side piece to wrap around this circumference, adding an extra 1/2 inch for overlap and stitching. The side should slope upward, becoming narrower at the top, creating the classic cowboy hat taper. For the top of the hat, use the outline of the hole cut for the brim as the template, adjusting the shape to match the specific style of the cowboy hat you desire. Ensure that the final pattern pieces include the brim, the side piece, and the top piece. Accurately transferring these patterns onto your selected leather is vital for the next steps in construction.
Cutting and Preparing Leather Pieces
To start making your cowboy hat, you’ll first cut the leather. Using the right techniques is key.
Cutting Techniques
Precision is crucial when cutting leather for your hat. Lay your pattern onto the leather and secure it with weights. Trace the pieces with a pen, and then cut with a sharp knife. Follow the lines closely for an exact fit. Cut slowly to avoid errors.
Preparing Edges for Stitching
After cutting, prepare the leather edges. Smooth them with an edger or sandpaper. This makes stitching easier and gives a clean look. Bevel the edges of the brim to increase comfort and style. This preparation is essential for a well-crafted hat.
Assembling the Pieces
Once your leather pieces are perfectly cut and prepped, it’s time to begin assembly. Good stitching is vital for durability and aesthetics.
Stitching the Side and Top Together
Start with the side piece of your cowboy hat. Stitch it, forming a cylinder to fit your head. With the suede side facing out, sew the edges, joining them. Make sure your stitches are even and strong. Then, align the top piece to the cylinder. It’s crucial to ensure the number of holes on both pieces matches to avoid puckering. Begin stitching from the front and work toward the back for a smooth look.
Attaching the Brim
Now, it’s time to connect the brim to the hat’s body. If you’ve done the previous step inside out, turn the hat right side out gently. Soak the leather if it’s too stiff. This will prevent unwanted creases. Attach the top of the hat to the brim with care, being mindful not to pull the stitches too tightly, to prevent the brim from warping. Count your stitches as before to ensure an even, wrinkle-free connection.
Shaping and Molding the Hat
Once the pieces of your cowboy hat are joined, shaping is next. This step defines the hat’s final look and how well it fits.
Wet Molding Techniques
Wet molding is necessary for a tailored fit and styled appearance. To start, dampen the leather lightly with a spray bottle. Avoid soaking it completely. Bend and fold the leather while it’s pliable to create the classic cowboy hat contours. Use your hands or a rounded tool to mold the brim and crown. Focus on getting the right curves and angles to match your design. If possible, wear the hat while damp to mold it to your head’s shape.
Drying and Setting the Shape
After molding, let the hat dry completely. Place it on a head form or stuffed head-shaped bag to keep the desired shape as it dries. The drying can take several hours, depending on the humidity and temperature. Do not rush this process. A slow, natural drying process helps the leather set firmly into its new shape. Once dry, your DIY cowboy hat should maintain its custom-molded shape. The leather may stiffen, which is normal and preserves the hat’s structure.
Adding Finishing Touches
After molding and stitching, add final touches to personalize and protect your DIY leather cowboy hat.
Installing a Sweatband
A sweatband enhances comfort and fit. Cut a 1 1/2-inch wide strip of soft deer hide to match your head’s circumference. Use leather contact cement for a secure attachment. Align the sweatband inside the hat rim, glue, and press firmly. Ensure it’s even and smooth around the interior.
Staining and Sealing
Staining adds color and character to your cowboy hat. Apply a medium brown Eco-Flo stain evenly. Avoid staining the interior to prevent color transfer. Before the stain dries, use a slicker to smooth the brim edges for a polished look. Seal the leather with Eco-Flo super sheen for protection. A second coat might be necessary for extra durability. Allow adequate drying time for best results.
Creating and Attaching the Hat Band
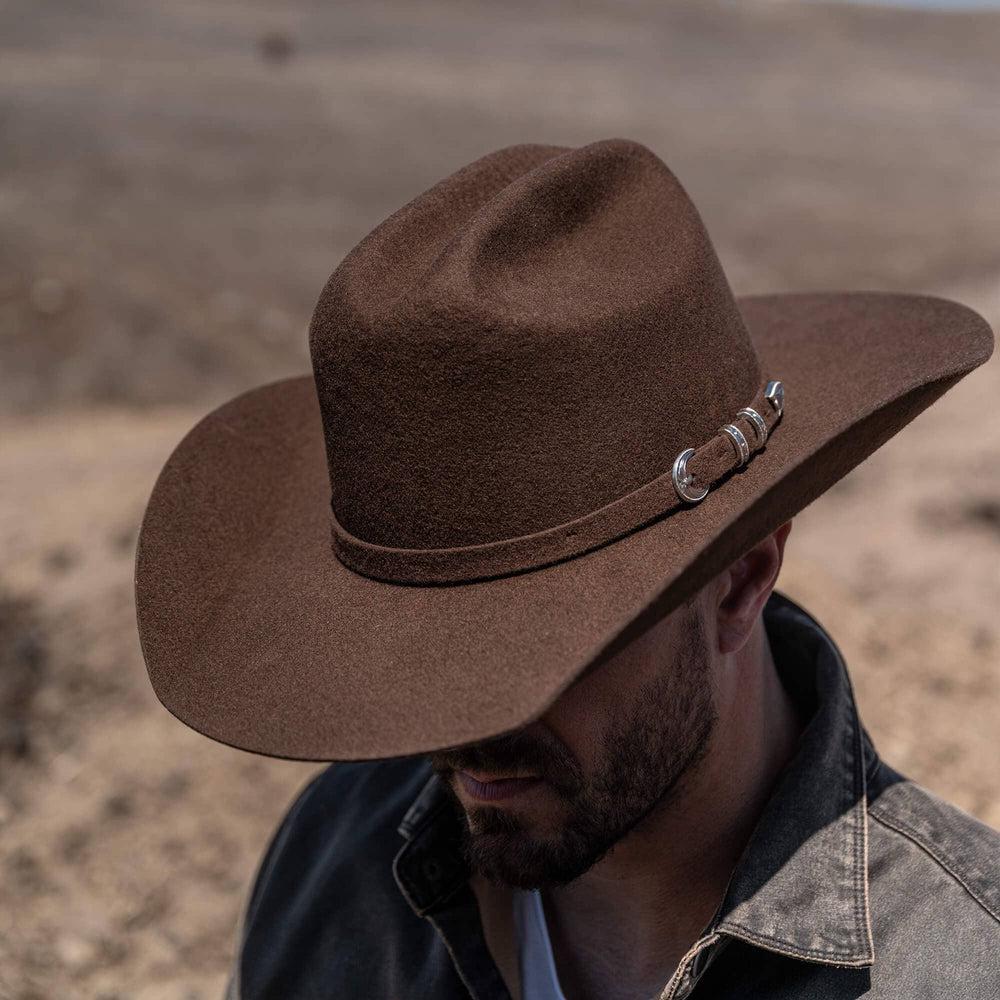
Designing a hat band adds a personal touch to your DIY leather cowboy hat. Use a piece of matching or decorative leather to make your band. Measure around the base of the hat crown and cut a strip slightly longer for stitching. Make it around one inch wide for a balanced look. Stain it with leather dye to complement or contrast your hat for style.
To attach the hat band, sew it at the back first. Ensure the seam is neat and strong. Then, use leather contact cement to adhere the band firmly around the hat’s crown. Press the band smoothly against the hat as you go. Keep it straight and level for professional results. Let the cement dry fully before moving on.
If you want, add embellishments to your hat band. Consider small metal conchos, decorative studs, or even a custom buckle. Place these carefully on the band for an extra flare. Attach them securely so they don’t come loose with wear.
Your hat band is not just decorative—it can also help adjust the fit. A tighter band can make your cowboy hat snugger if it feels loose. Experiment with the tension to find a comfortable fit. Remember, the hat band can be replaced or changed to update the look of your hat over time.
Maintenance and Care of Your Leather Cowboy Hat
Caring for your DIY leather cowboy hat properly ensures it lasts longer and looks great. Here are essential tips:
Regular Cleaning
Regularly clean your cowboy hat to remove dust and dirt. Use a soft brush to gently wipe the leather. For deeper cleaning, use a damp cloth, but ensure it’s only slightly moist.
Condition the Leather
Applying a leather conditioner helps maintain the leather’s flexibility and prevents cracks. Do this every few months, depending on how often you wear the hat.
Keep it Dry
Avoid exposing your hat to water. If it gets wet, let it air dry naturally, away from direct heat. This prevents the leather from warping or shrinking.
Storage Tips
Store your hat in a cool, dry place. Use a hat form or stuff it with tissue to hold its shape. Avoid folding or crushing it, which can create permanent creases.
Avoid Sun Damage
Prolonged exposure to sunlight can fade leather. When not wearing your hat, store it in a shaded area.
By following these simple care instructions, your handmade leather cowboy hat will remain a stylish part of your wardrobe for years to come.
