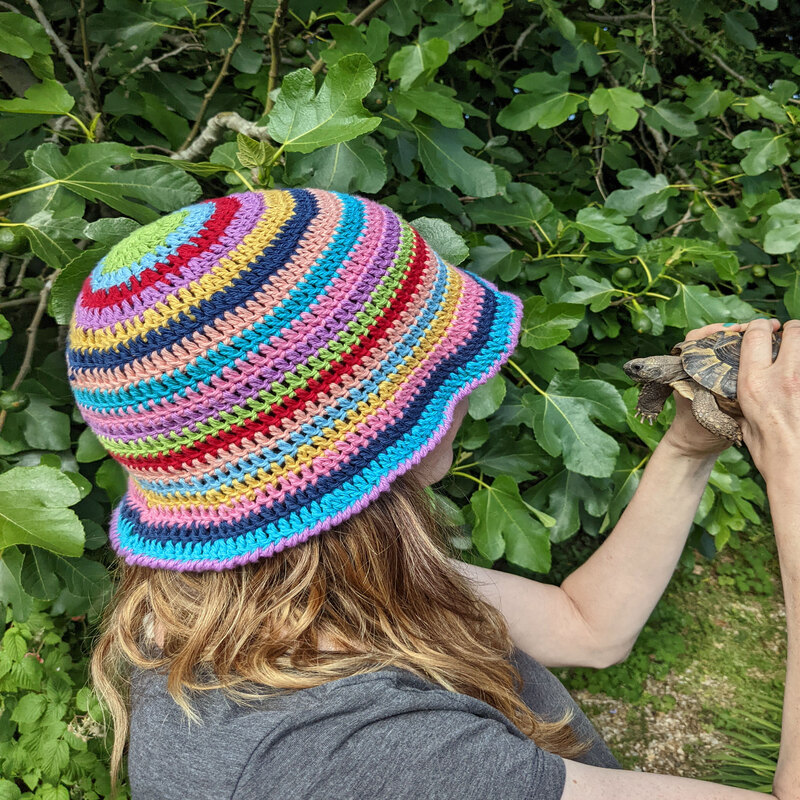
Crocheting a bucket hat is an exciting project for beginners. Not only is it stylish, but it also allows for creativity. As you work through this article, you will learn the essentials. We will cover materials, techniques, and step-by-step instructions. By the end, you will feel confident in making your own bucket hat.
Understanding Materials for Your Bucket Hat
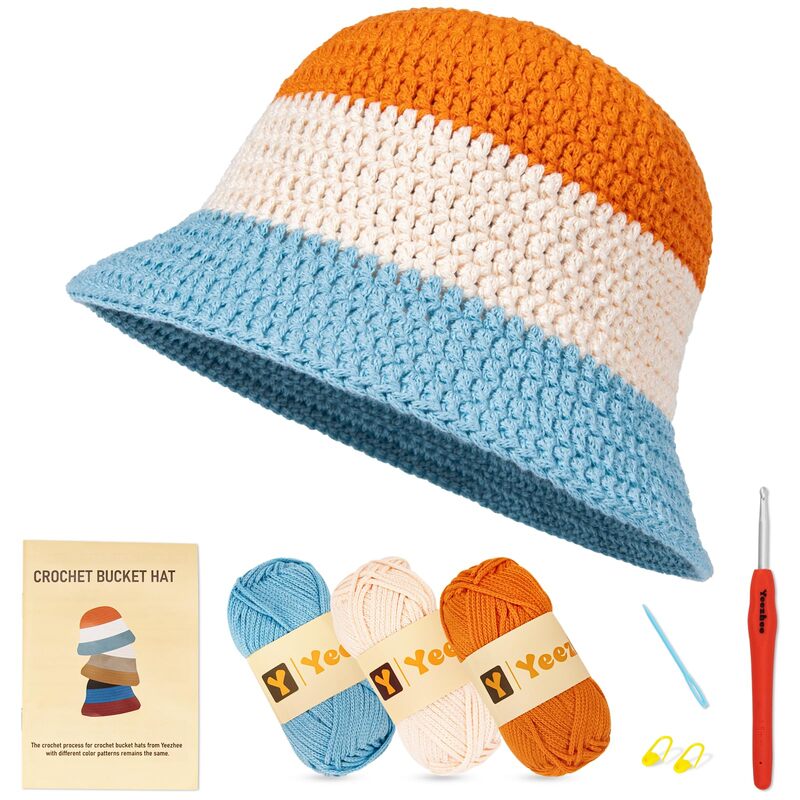
Before diving into crochet, it is essential to gather the right materials. The choice of yarn greatly influences your project. Beginners are often advised to use cotton or acrylic yarn. Cotton yarn is breathable, making it suitable for summer hats. On the other hand, acrylic is more affordable and comes in various colors. Therefore, consider your climate when selecting yarn.
Additionally, you will need a crochet hook. For most worsted weight yarns, a size H (5 mm) crochet hook works well. If you are unsure, it’s a good idea to check the yarn label. The label usually provides guidance on the recommended hook size. Lastly, having a pair of scissors and a yarn needle is essential for finishing your project.
Selecting Your Yarn
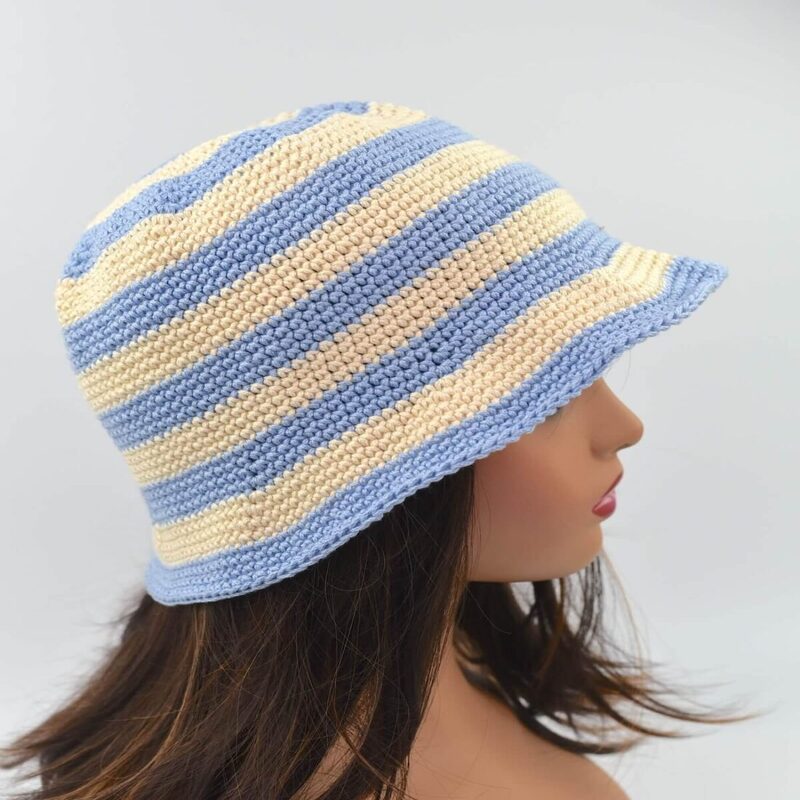
Choosing the right yarn can make your project enjoyable. For a bucket hat, cotton is often preferred. Its durability and softness are key. However, if you want vibrant colors, explore acrylic yarn. You can find an endless array of shades. Therefore, let your personality shine through your color choices.
Furthermore, consider the weight of your yarn. Worsted weight yarn is commonly used in bucket hats. It strikes a good balance between thickness and flexibility. This means your hat will maintain its shape while being comfortable. Thus, it’s vital not to overlook your yarn selection, as it sets the tone for your entire project.
Necessary Crochet Tools
Apart from yarn, gathering tools is crucial. A quality crochet hook helps maintain tension and even stitches. It makes your experience smoother. The right hook size also prevents frustration. If you pick a size too small, your stitches could be too tight. Conversely, a size too large can lead to gaps.
Moreover, you might consider stitch markers. They help track your rounds, particularly useful for large projects. A yarn needle is essential for weaving in ends. It creates a clean finish, enhancing the appearance of your hat. Therefore, having the right tools will improve your crocheting experience.
Basic Crochet Techniques
Now that you have your materials, it’s time to learn some fundamental techniques. Grasping the basic stitches is vital for success. The most commonly used stitch in a bucket hat is the single crochet stitch. This stitch forms a tight, sturdy fabric. You may also want to familiarize yourself with the double crochet stitch. This stitch works well for open areas.
Understanding how to increase and decrease stitches is also essential. Increases allow your hat to widen, while decreases create shaping. These techniques add versatility to your crochet skills. Therefore, take some time to practice these stitches before you start on your bucket hat.
Getting Started with Basic Stitches
To begin, make a slip knot to secure your yarn on your hook. Next, practice chaining. The chain stitch forms the foundation for many projects. For a bucket hat, you might chain 4 to start. After that, join your chain into a ring using a slip stitch. This ring serves as your starting point. Ensuring it’s tight but not too tight is essential for comfort.
Once you have your ring, you can start your single crochet stitches. Insert your hook into the center of your ring, yarn over, and pull through. You will have two loops on your hook. Yarn over again, then pull through both loops. Congratulations! You just completed a single crochet stitch. Repeat this around your ring to build the base of your hat.
Understanding Increases and Decreases
Increases are necessary for shaping the bucket hat’s crown. To increase, simply crochet two stitches into one stitch. This adds width, creating a flared shape. You might want to practice increasing in your swatches before starting your bucket hat. Conversely, decreases narrow your fabric. You can decrease by crocheting two stitches together. This creates a nice tapered effect at the bottom of the hat.
Moreover, familiarize yourself with spacing your increases. For a structured look, consider placing increases evenly around your round. This promotes a balanced appearance. However, if you prefer a looser hat, you can space your increases more widely. Therefore, understanding these basic techniques will set the stage for your crochet success.
Step-by-Step Instructions for the Bucket Hat
Now that you’re familiar with the basics, let’s dive into the actual steps for crocheting your bucket hat. This section will guide you through each stage. You’ll be amazed at how simple it is once you break it down.
Starting with the Crown
Begin your bucket hat by creating the crown. Using your preferred yarn and hook size, create a slip knot. Chain four stitches and join to form a ring. This ring serves as the foundation for your hat. Once you have a stable ring, you will work your single crochets.
Crochet six single crochets into the ring. Remember to keep your stitches tight but flexible. After the first round, you should have six stitches. For the next round, increase by adding two single crochets into each stitch. This will give you a total of twelve stitches. Continue this pattern for several rounds, increasing as necessary until your crown measures about 6-7 inches in diameter.
Building the Sides
Once you’ve reached the desired crown size, it’s time to work on the sides of your bucket hat. For this section, you will use single crochet stitches in each stitch without increases. This is where you will start to see the shape of your bucket hat form. In this step, continue doing single crochets for around 3-4 inches.
Keep your tension consistent as you work through this part. If you’re finding it difficult, don’t hesitate to pull out your stitches and start again. After all, practice is a key element in crocheting. Before long, you’ll be cruising through this section. Just remember to check the width periodically.
Shaping the Brim of Your Bucket Hat
The brim is what makes a bucket hat distinctive. It provides shade and adds flair. In this section, we will guide you through creating the perfect brim.
Creating Brim Width
To start shaping the brim, you’ll need to introduce increases again. Depending on how wide you want your brim, you can increase every third or fourth stitch. This adjustment will give a lovely flare to your hat. As you work through this process, remember it’s perfectly okay to experiment.
Some crocheters may choose to create a wider or narrower brim. Adjusting your increases allows you to customize your hat’s style. Experiment with different measurements to find the fit that’s just right for you.
Finishing Touches to the Brim
Once you are satisfied with the width of your brim, it’s time to finish. This involves completing your last round of stitches. After reaching your desired length, begin to weave in all loose ends. Use your yarn needle to ensure a neat finish. A clean hat is aesthetically pleasing and shows your dedication to the craft.
You have a few options for finishing touches. Embellishments like ribbons or buttons can enhance your bucket hat’s visual appeal. Moreover, consider adding a decorative stitch around the brim. Simple touches can add a lot of character to your creation.
Finalizing Your Bucket Hat
You’re almost there! Now that your hat is nearly complete, it’s time to add the finishing touches. The final steps are essential for achieving a polished look.
Weaving in the Ends
Begin by weaving in any loose ends. Grab your yarn needle and thread it with the end of the yarn. Insert the needle under the stitches on the inside of your hat. This helps secure the yarn and keeps everything tidy. You should take a few stitches in different directions for better security.
After you have finished weaving, cut any excess yarn. Be sure not to cut it too close to your work. It’s important to leave enough length to prevent unraveling. Once everything is secure, your hat should look clean and professional.
Blocking Your Hat
Finally, consider blocking your hat. Blocking shapes your work and ensures a good fit. You can steam block it by holding a steamer above the hat. Alternatively, you can soak it in warm water and then reshape it on a flat surface. This process helps your hat maintain its structure and enhances its overall appearance.
Blocking is especially important for brimmed hats. It helps maintain the desired shape and gives your hat a polished and professional look. Remember to check the care instructions for your yarn before proceeding with blocking.
Conclusion: Enjoying Your New Bucket Hat
Congratulations on completing your bucket hat! This project allows for personal expression. You can wear your stylish accessory proudly, showcasing your crochet skills. A bucket hat is versatile and functional, perfect for outdoor outings.
Furthermore, you can experiment with different yarn types for varied textures. Perhaps try chunky yarns for winter hats or lightweight options for summer styles. The possibilities are endless when it comes to customizing your bucket hat.
As you gain confidence, consider trying advanced designs. Adding patterns or colors can further elevate your hats. Crocheting is an ever-evolving craft, so keep experimenting. Each project builds your skills and enhances your creativity. Enjoy the process, and happy crocheting!