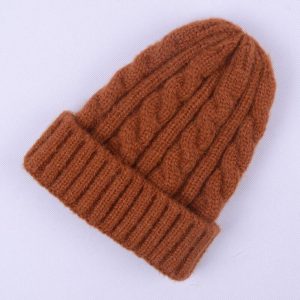
Knit a baby hat can be a rewarding and fulfilling project. Whether you’re a beginner or seasoned knitters, making a hat for a little one brings joy. Moreover, it offers a personal touch for gifts. This guide provides detailed instructions, tips, and techniques for creating a warm, cozy hat that any baby will love.
Gathering Materials for Your Baby Hat
Before starting your knitting project, you need to gather appropriate materials. First, choose the right yarn. Opt for soft, hypoallergenic yarn to ensure it’s gentle on a baby’s sensitive skin. Natural fibers like cotton or merino wool can be excellent choices. They are breathable and warm, meeting the needs of various climates.
Additionally, select the correct knitting needles. You can use circular or straight needles, depending on your preference. A size 5 or 6 needle typically works well for most baby hat patterns. Furthermore, you will need a tape measure to ensure your hat fits perfectly. Lastly, don’t forget a tapestry needle for weaving in ends once you complete the project.
Choosing the Right Yarn
When selecting yarn, consider color and texture. Babies often respond well to bright, cheerful colors. However, soothing pastels can also be delightful. Consider the recipient’s style or the nursery’s theme when picking colors.
Texture is also critical for a baby hat. Soft yarn will be gentler against a baby’s head. Avoid any yarn that might irritate delicate skin. You can even explore variegated or speckled yarns for added fun. When in doubt, read reviews and opt for popular yarn brands known for their baby-friendly products.
Selecting Knitting Needles
Choosing knitting needles is also important for your hat project. The type of needles can influence your overall knitting experience. You might find plastic needles helpful for beginners as they are lightweight and easy to handle. Conversely, metal needles can offer better tension control for more experienced knitters.
Remember, the size of the needle affects the fabric’s final appearance. Larger needles create a looser knit, while smaller needles yield a tighter look. Thus, you should ensure the needle size matches your chosen yarn. Following the yarn label’s recommended size is often advisable.
Understanding Baby Hat Measurements
Accurate measurements ensure your hat fits comfortably. Unlike adult sizes, baby sizes can vary significantly. Therefore, knowing head circumference is vital. For example, newborns typically have a head circumference of about 13 to 15 inches. In contrast, older babies may measure between 15 to 18 inches.
Moreover, consider the hat length. Most beanie-style baby hats should be approximately 6 to 8 inches long. Remember that babies grow quickly, so you may want to make slightly larger sizes. You might even consider adding a bit of stretch, as it extends wearability.
Measuring Head Circumference
Measuring head circumference involves a simple procedure. You can use a soft tape measure for best results. Position the tape around the widest part of the baby’s head, just above the ears. Make sure the tape fits snugly but isn’t too tight.
After obtaining this measurement, note it down for your records. This measurement ensures that your hat will fit comfortably. If you are knitting for a shower gift, it may help to ask about baby sizes. Most parents will appreciate a hat that fits well and can be worn right away.
Considering Hat Length
Besides head circumference, measuring the proper hat length is crucial. To determine this length effectively, use the same tape measure. Measure from the top of the head downward. Take note of how far you want the hat to come down on the forehead.
You may also want to account for the possibility of a roll brim. This technique requires additional length, as the brim will unfold over time. Adding about an inch or two gives more versatility for the hat.
Selecting a Knitting Pattern
Once you have your materials and measurements ready, it’s time to select your knitting pattern. Several options are suitable for baby hats, from simple stitches to more complex designs. You might want a basic beanie pattern if you are new to knitting.
Conversely, experienced knitters could explore patterns that involve cables or colorwork. Ravelry is an excellent platform to find various free and paid patterns. Additionally, many knitting books focus on baby apparel that you could explore.
Basic Baby Beanie Patterns
For beginners, a basic beanie pattern works well. This pattern typically incorporates simple knit and purl stitches. A stockinette stitch creates a smooth fabric that feels comfortable against a baby’s head.
Start by casting on the required number of stitches. Generally, for a newborn-sized hat, this can be around 60 stitches. After casting on, knit in the round for several inches, achieving your desired length. Finally, decrease stitches methodically to form the shape of the crown.
Advanced Techniques for Experienced Knitters
For more advanced knitters, integrating techniques like cables or colorwork can add flair. You could opt for a patterned hat featuring contrasting colors or textures.
These techniques can make your baby hat unique. However, be sure you’re comfortable with the stitch techniques before starting. It may be beneficial to practice on scrap yarn first.
Knitting Techniques for Baby Hats
Understanding different knitting techniques can enhance your baby hat. Techniques such as knitting in the round, ribbing, and decreasing for the crown are essential. Knowing how to execute these stitch techniques will enable you to create a flawless hat.
Knitting in the round is crucial for beanie designs. This technique eliminates annoying seams, leading to a comfortable fit. It allows for continuous work without interruptions. Many beginners find this technique for circular needles beneficial.
Knitting in the Round
When knitting in the round, it’s essential to maintain proper tension. Hold your yarn consistently to prevent uneven stitches. Start by joining your stitches into a circle, ensuring that they aren’t twisted.
Use stitch markers to signal the beginning of your round. This makes it easier to count rounds as you knit. Exceptions arise if you are working with multiple colors or patterns, but markers can still guide you.
Ribbing for Edges
Ribbing is a popular choice for the edges of baby hats. It adds elasticity, allowing the hat to fit snugly without slipping off. You might use a 1×1 or 2×2 rib pattern for this purpose.
To create ribbing, alternate between knit and purl stitches. This technique produces a textured fabric that feels comfortable. Additionally, ribbing can prevent rolling, ensuring a neat appearance.
Decreasing Stitches for the Crown
Decreasing stitches forms the crown of the baby hat. This process creates a tapered shape at the top, essential for a floppy look. Gradually reducing stitches will give your hat a polished finish.
Begin decreasing once you’ve reached the desired length. There are various methods for decreasing, such as “knit two together.” This method involves knitting two stitches together to reduce the total stitch count. Furthermore, be sure to maintain your tension as you decrease.
Techniques for Even Decreases
Even decreases are crucial for maintaining the aesthetic of your hat. Aim for evenly spaced decreases throughout the round. You can decrease every few rounds to manage tension and maintain a smooth appearance.
Keep track of your rounds and decreases to avoid confusion. Some knitters prefer to use a spreadsheet or notebook to record their progress. Moreover, visual cues, such as stitch markers, can significantly assist in recognizing decrease rounds.
Finishing Off The Crown
Once you have completed your decreases, closing the crown of the hat is vital. This step requires careful attention. You will typically have a few stitches remaining after decreases.
You can thread a tapestry needle through the remaining stitches. Pull the yarn tightly to ensure the top closes securely. Afterward, weave in any loose ends inside the hat. This will help create a polished final product, ready for wear.
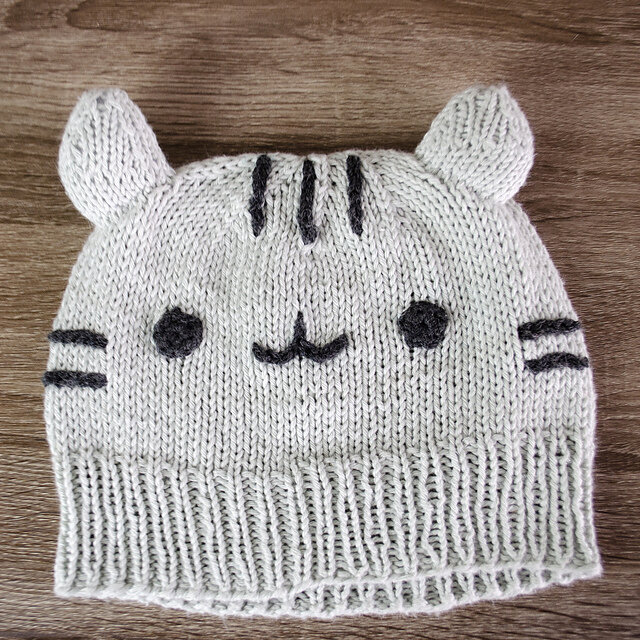
Adding Personal Touches and Embellishments
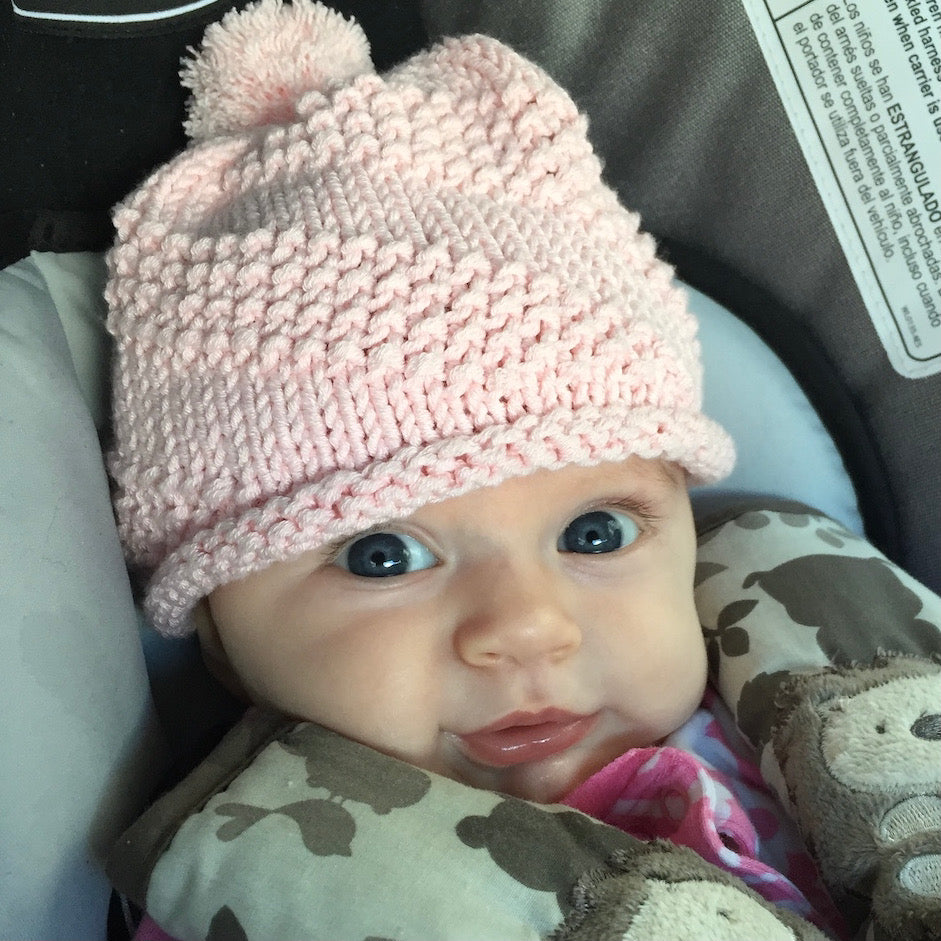
After finishing the basic hat, consider adding personal touches. Adding embellishments or different techniques can enhance its charm. Simple elements, such as bows or pom-poms, can bring a hat to life.
Moreover, playful patterns using yarn can introduce aesthetic interest. For instance, stripes or Fair Isle designs can make a hat stand out. Adding a personal label can make the project feel even more special, as well.
Embellishments and Accessories
When choosing embellishments, ensure they are baby-safe. Avoid anything small that poses choking hazards. Therefore, focusing on larger, securely stitched items can be safe choices.
You might also consider adding matching mittens or booties to the ensemble. This way, the baby has a complete outfit. Coordinated colors or patterns help in creating a unified look.
Personalizing Your Hat
To further personalize your hat, consider monogramming or initial designs. If you have the skills, you could knit letters directly onto the hat. This adds uniqueness and sentimental value.
Stitch the initials using contrasting colors for visibility. Alternatively, you can crochet small appliqués to embellish the hat. These options allow for creativity while ensuring the hat remains functional.
Conclusion: Completing Your Baby Hat Project
In conclusion, knitting a baby hat is a fulfilling project for crafters. Through careful material selection and execution of techniques, you can create a wonderful gift. The joy of seeing a baby wear something handmade is truly rewarding.
You can choose from various patterns, styles, and embellishments when designing your hat. Make sure to factor in safety and comfort for the little one. Knowing that your creation will be appreciated by parents and loved ones adds to the experience.
Whether for a baby shower, gift, or your own grandchild, crafting a baby hat is worthwhile. Ensure you enjoy each step of the process while learning new techniques. Embrace creativity and have fun with every stitch!