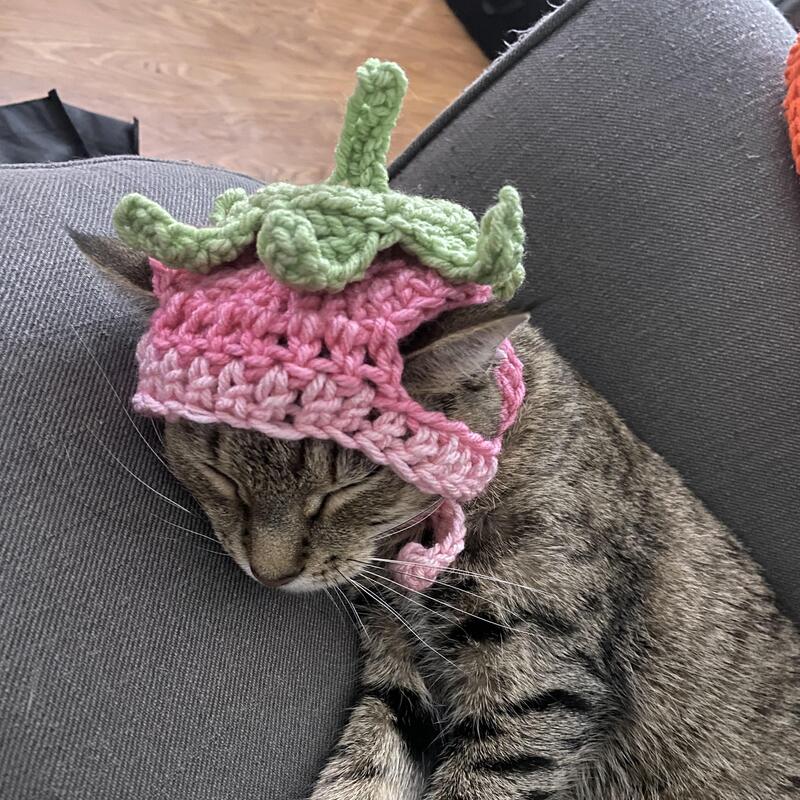
Crocheting a cat hat is a fun and creative way to make a special accessory for your feline friend. These hats can add flair to photoshoots, and holiday celebrations, or simply show off your cat’s unique personality. Understanding how to crochet a cat hat involves selecting the right materials, mastering the necessary stitches, and following a detailed pattern. Therefore, this guide provides comprehensive instructions on how to crochet a cat hat, from gathering materials and choosing yarn to advanced techniques and finishing touches. By following these steps, you can create a stylish, comfortable, and custom-made hat for your beloved pet.
Gathering Materials and Tools
Before you start crocheting, gathering the necessary materials and tools is essential. Therefore, understanding what you need will ensure a smooth project.
Choosing the Right Yarn
Selecting the right yarn is crucial for your cat’s comfort and the hat’s appearance. Opt for a soft, washable yarn that won’t irritate your cat’s skin. Cotton and acrylic yarns are excellent choices due to their softness and durability. Additionally, consider the yarn thickness; a medium weight (worsted) yarn works well for most projects. Choosing the right yarn ensures the hat is both comfortable and stylish. Therefore, recognizing the importance of yarn selection starts your project off on the right foot.
Essential Tools
In addition to yarn, you’ll need several tools to complete your project:
- Crocheting hook (usually size 4.5mm or 5mm)
- Tapestry needle
- Stitch markers
- Scissors
- Measuring tape
Having all these tools at your disposal helps you follow the pattern accurately and efficiently. Therefore, understanding the necessary tools ensures you are well-prepared for the crocheting process.
Mastering Basic Crochet Stitches
Before diving into the cat hat pattern, mastering basic crochet stitches is vital. Therefore, understanding these stitches will enable you to follow the pattern easily.
The Chain Stitch
The chain stitch is the foundation of most crochet projects. To create a chain stitch, loop the yarn over the hook and pull it through the loop on the hook. Repeat this process to form a series of chain stitches. The chain stitch is commonly used to start crocheting in rounds or rows. Understanding how to make a chain stitch ensures a strong foundation for your project.
The Single Crochet Stitch
The single crochet stitch is another essential stitch you’ll need. To create a single crochet stitch, insert the hook into the specified stitch, yarn over, and pull up a loop. Then, yarn over and pull through both loops on the hook. Repeat this process as needed for your pattern. Mastering the single crochet stitch ensures you can follow the pattern and create a tightly woven fabric. Therefore, recognizing the importance of these basic stitches is crucial for your project’s success.
Crocheting the Cat Hat
Now that you’ve gathered your materials and mastered basic stitches, you’re ready to start crocheting the cat hat. Therefore, understanding the pattern is crucial for a successful project.
Creating the Hat Base
The hat’s base forms the crown and body of the hat. Start by making a magic ring (or adjustable loop) and crocheting several single crochet stitches into the ring. Pull the ring tight to close the loop. Join your stitches with a slip stitch and chain one.
Next, crochet increasing rounds to form the crown:
- Round 1: Single crochet twice in each stitch around. (12 stitches)
- Round 2: *Single crochet in the next stitch, then single crochet twice in the next stitch. Repeat from * around. (18 stitches)
Continue increasing as required by the pattern until you reach the desired circumference. The base sets the stage for the rest of the hat. Therefore, understanding how to create the hat base ensures a properly fitted hat.

Building the Hat Body
Once the base is the right size, continue crocheting without increasing to build the hat’s body. This part creates the sides of the hat that will cover your cat’s head. Continue single crocheting in each stitch around until the hat reaches your desired length. Most patterns require about 4-5 inches from the top of the crown to the bottom edge. Building the hat body ensures the hat covers your cat’s head comfortably. Therefore, paying attention to the length and fit is crucial.
Adding The Ear Holes and Ears
Adding ear holes and crocheting the ears are critical steps for making the hat comfortable. Therefore, understanding these components is essential.
Creating Ear Holes
To create ear holes, measure the distance between your cat’s ears and mark the appropriate spots on the hat. For most cats, ear holes should be about 2-3 inches apart. Following the pattern, crochet as usual until you reach the first marked spot.
Make a chain of stitches that spans the width of the ear hole and skip the corresponding number of stitches on the hat body. Continue crocheting around the hat and make the second ear hole in the same manner. Properly placed ear holes ensure the hat is comfortable for your cat. Therefore, recognizing the importance of ear holes is crucial.
Crocheting the Ears
To crochet the ears, start by making a smaller magic ring and single crocheting into it. Follow a similar pattern of increasing rounds to form a triangular shape.
- Round 1: Single crochet six times into the ring. (6 stitches)
- Round 2: *Single crochet in the next stitch, then single crochet twice in the next stitch. Repeat from * around. (9 stitches)
Continue increasing until the ears are the desired size. Make two matching ears and sew them onto the hat, positioning them symmetrically near the ear holes. Adding the ears gives the hat a cute and playful look. Therefore, understanding how to crochet and attach the ears is essential.
Advanced Techniques and Embellishments
Incorporating advanced techniques and embellishments can elevate your cat hat project. Therefore, exploring these extra touches is valuable for customization.
Adding Straps
Adding straps to the hat can help keep it securely on your cat’s head. To create straps, attach yarn to one side of the hat base and crochet a series of chain stitches, typically around six inches long. Attach the chain to the opposite side of the hat or create a loop to tie the strap securely. Repeat on the other side if needed. Straps ensure the hat stays in place, especially for active cats. Therefore, recognizing the importance of straps enhances practicality.
Adding Decorative Elements
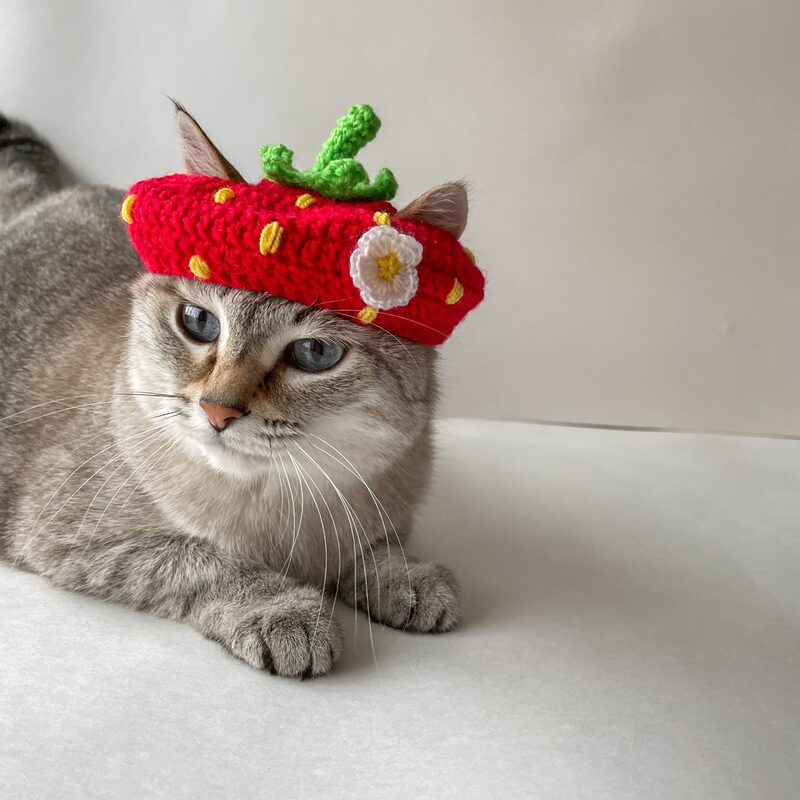
Adding decorative elements like bows, flowers, or pompoms can make the hat more stylish and unique. To create a bow, crochet a rectangular piece, cinch it in the middle with yarn, and sew it onto the hat. Flowers can be crocheted separately and attached, while pompoms can be made using extra yarn and tied securely. Customizing the hat with decorations adds a personal touch. Therefore, exploring decorative options enhances creativity and style.
Finishing Touches
Finishing touches complete your cat hat project and ensure it looks polished. Therefore, understanding these final steps is essential.
Weaving in Ends
After finishing all the crocheting, weave in any loose yarn ends using a tapestry needle. This step ensures that there are no loose threads that could unravel or be a choking hazard. Trim any excess yarn carefully. Properly weaving in ends ensures a neat and professional finish. Therefore, recognizing the importance of this step is crucial.
Blocking and Shaping
Blocking and shaping your crochet project can help it look more polished. To block, lightly wet the hat, shape it to the desired form, and allow it to dry completely. Some yarn types may benefit from steaming instead of wetting. Blocking helps the hat maintain its shape and fit better. Therefore, understanding the importance of blocking and shaping enhances the final product.
Conclusion
Understanding how to crochet a cat hat involves several key steps, from gathering materials to adding finishing touches. Proper knowledge of these aspects ensures a successful and polished project.
Exploring elements like choosing the right yarn, mastering basic crochet stitches, creating the hat base, and adding ear holes provides valuable insights. Recognizing the importance of building the hat body, crocheting the ears, and incorporating advanced techniques further enhances your understanding.
By engaging with these steps, you can effectively create a stylish, comfortable, and custom-made cat hat. Therefore, whether for photoshoots, festive celebrations, or everyday fun, understanding these techniques offers practical and valuable insights. Embrace the opportunity to showcase your creativity, knowing you have the knowledge and resources to crochet a beautiful and functional cat hat!